From Frame to Fabric
Building a Wingback Chair, Step-by-Step
There's something magical about watching a piece of furniture come to life. It starts as a simple wooden skeleton and, layer by layer, transforms into a comfortable, stylish chair. I recently documented the process of upholstering this classic wingback chair, which uses modern materials and techniques on a traditional frame.
Here’s a breakdown of the key stages, from the bare wood to the (almost) finished piece.
Stage 1: The Bare Bones and First Steps
This is our starting point. We have a high-quality, pre-assembled wooden frame. Before any fabric goes on, the process begins with padding.
Leg Protection: Notice that the front legs are already wrapped in plastic. This is a crucial preparatory step to protect the finished wood stain from scuffs, glue, or stray staples during the upholstery process.
Initial Padding: On the inside of the arms, you can see the first layer of padding being applied. This is typically a shaped piece of foam topped with a layer of white Dacron (polyester wadding). This creates the soft, curved shape of the arm and smooths out the hard edges of the frame.
First Fabric: Interestingly, the very first pieces of plaid fabric have been attached to the top edge of the wings. These small pieces act as an anchor point and establish the alignment for the rest of the wing panel.
Stage 2: Upholstering the Inner Arms and Wings
Once the initial padding is complete, it's time to apply the main fabric to the "insides" of the chair. This is always done before the "outsides."
Inner Panels: The pre-cut fabric panels for the inner arms and inner wings are now stretched into place.
Tension and Securing: This is a high-skill step. The fabric must be pulled with consistent tension to ensure it's perfectly smooth and free of wrinkles.
Modern Technique: As you can see on the workbench, we're using a modern staple gun (the blue tool). This is much faster and more efficient than the traditional hammer-and-tack method. The fabric is pulled taut and stapled directly to the outside of the arm and wing frame. These staple lines will be hidden by the outer fabric panels later.
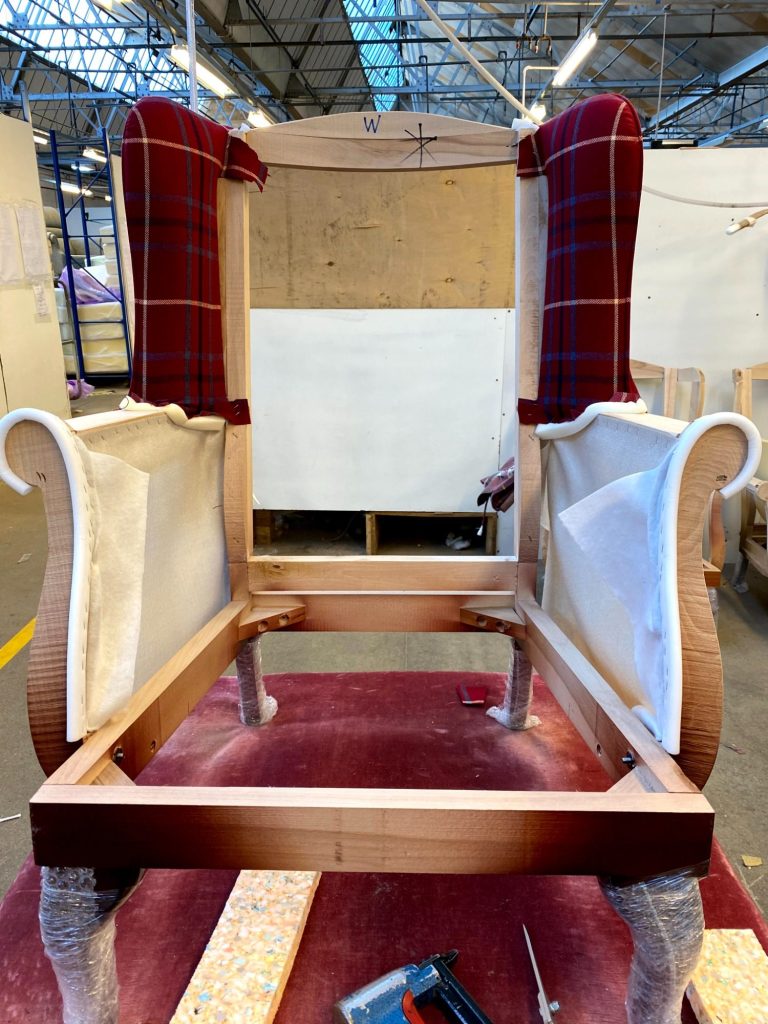
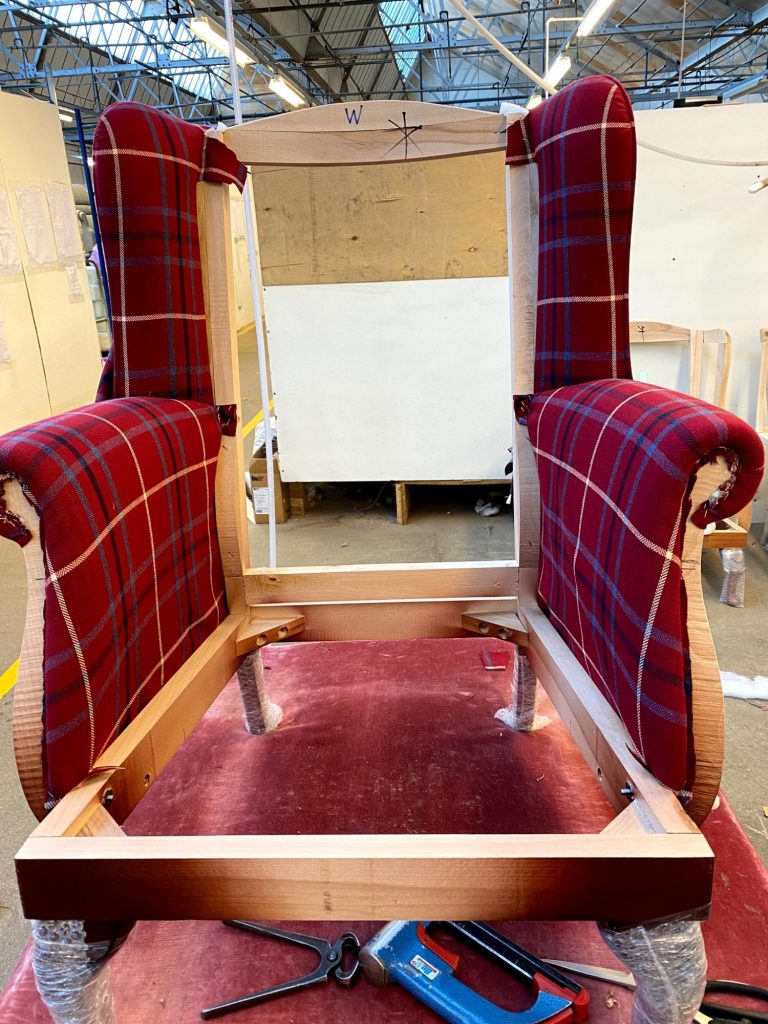
Stage 3: Fitting the Inner Back
With the arms and wings in place, the inner back is next. This is the largest single panel on the inside and provides the main support for the person sitting.
Back Padding: Just like the arms, the back panel is built with a foundation of foam and Dacron to provide comfort and create the signature "winged" shape.
Fabric Application: The large, cut-to-shape piece of plaid fabric is then laid over the padding. It's anchored first at the top—you can even see the framer's "W" and "X" center-line markings on the bare wood in the previous photo, which the upholsterer uses for alignment.
Stretching: The fabric is then pulled down and outwards, carefully smoothed, and stapled to the frame at the bottom and sides. It's tucked neatly around the arm joints to create a clean, seamless interior.
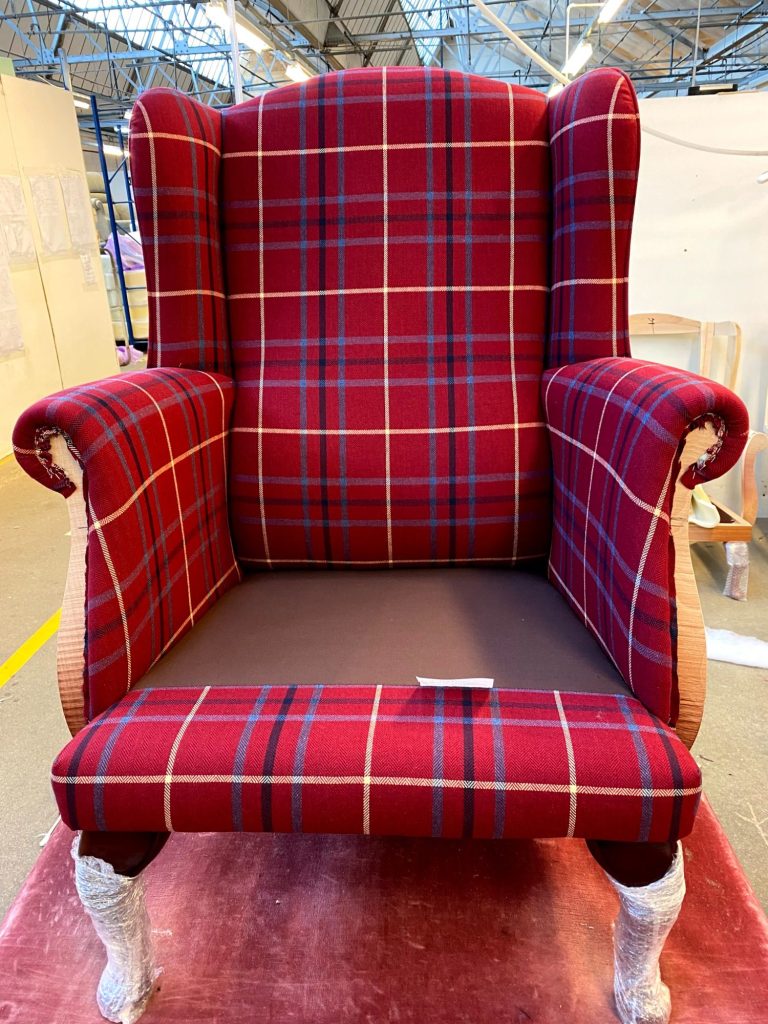
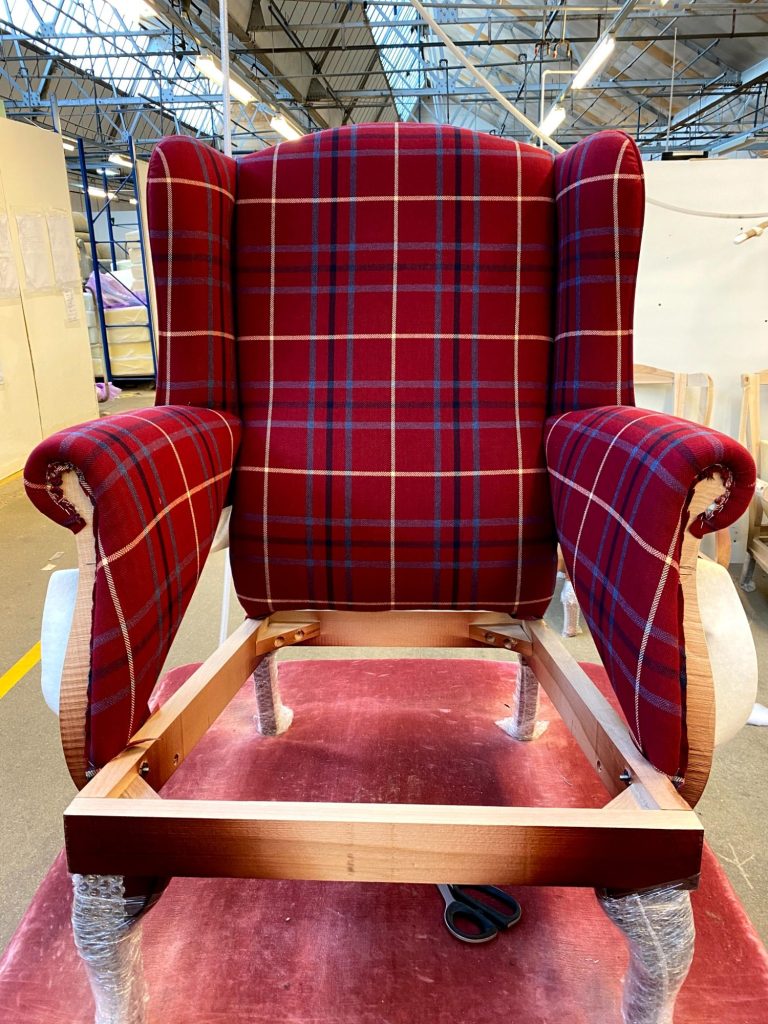
Stage 4: The Seat Deck and Front Rail
Now that the entire "inside" of the chair is upholstered, we move to the base.
Seat Deck: The area where the cushion will eventually sit is called the seat deck. As it will be hidden, a durable, non-decorative fabric is used (here, it's plain brown). This is stretched over the springs or webbing (which are already part of the frame) and stapled down.
Front Rail: The front-facing piece of wood below the seat deck is now upholstered. This piece, often called the front rail or apron, is padded to give it a soft, rounded profile. The plaid fabric is then meticulously fitted and secured underneath the chair.
Stage 5: Closing the Back
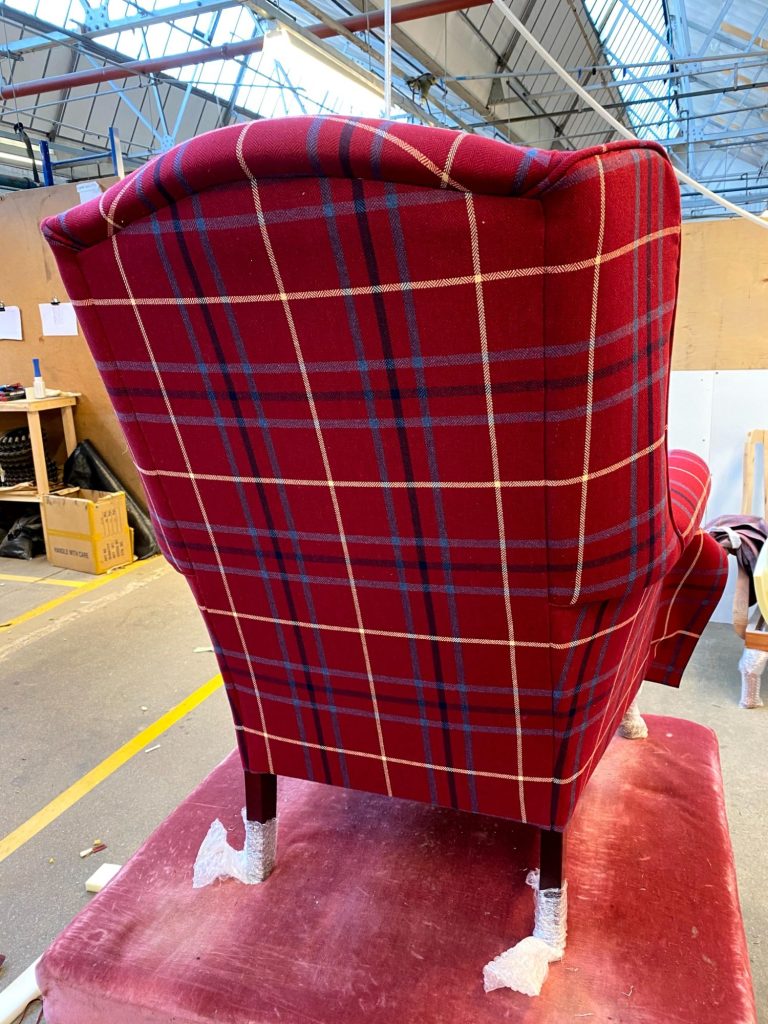
This is one of the final and most satisfying steps. Up until now, the outside of the chair has been a mess of staples and raw fabric edges. The outside panels are applied last to cover everything up.
Final Panels: The pre-cut panels for the outside arms and outside back (shown here) are put in place.
Creating Clean Edges: This final back panel is stapled along the top rail. The fabric is then pulled down taut. The side and bottom edges are carefully folded under to create a perfectly clean, straight line.
Securing: This folded edge is secured using a "blind" or "top stitching" method. In a modern workshop, this is often done with a pneumatic staple gun that fires fine-gauge staples into the hard-to-reach edges, or sometimes with a curved needle and thread for a truly traditional finish.
The (Almost) Finished Product

And here it is. The chair is now fully upholstered. All the layers of padding and fabric have come together to create a finished piece. The only thing missing is the separate seat cushion, which is built separately and dropped into place. It's a fantastic example of how modern techniques can be used to create a timeless, traditional piece of furniture.
I hope this step-by-step look at the process was insightful!
If you're keen to learn these skills for yourself, why not join one of our upholstery weekend workshops? Here at Greenwood Upholstery, you can come learn in a hands-on environment and reupholster your own project,